Overview
To connect to WiFi without Windows complaining that it does not trust the server or network we need to add a certificate to the store.
You must have administrative rights to your computer to complete these steps.
Before you manually configure your computer, be sure to download the required certificates from : HERE. (Available from within school only for now.)
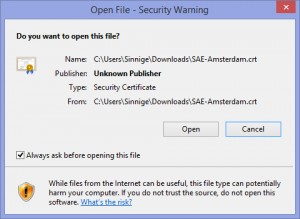
Double click the certificate after downloading it to start the installation. It will immediately issue a security warning, which you will have to accept by pressing open.
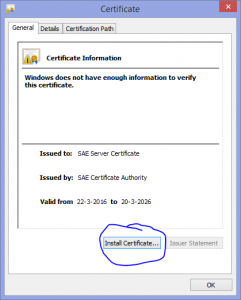
In the next screen press “Install Certificate”
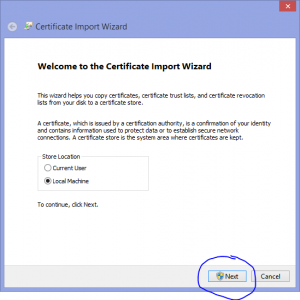
Then select “Local Machine” as the location and press next.
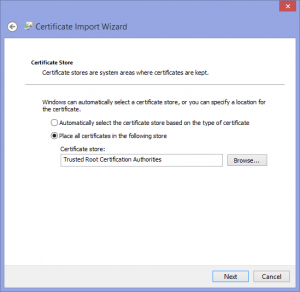
Press Browse and select the “Trusted Root Authorities” store as the correct place.

After completion it shows you an overview and you can simply hit finish.

Ok, now that certificate is installed.
